
 I love my studio. Actually, I guess what I love is the quiet alone time I have in my studio, lol.
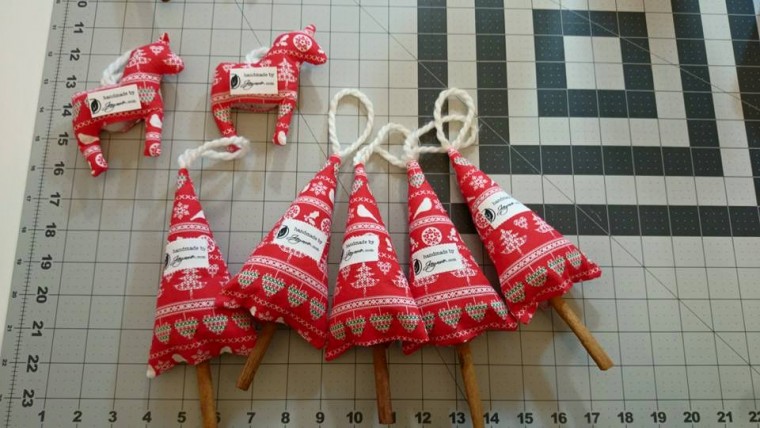
Recently I have been on a diy Christmas ornament kick. I saw this adorable Etsy listing for a fabric Christmas tree ornament with the trunk being a cinnamon stick. I thought – meh – I can make that, and so can you!
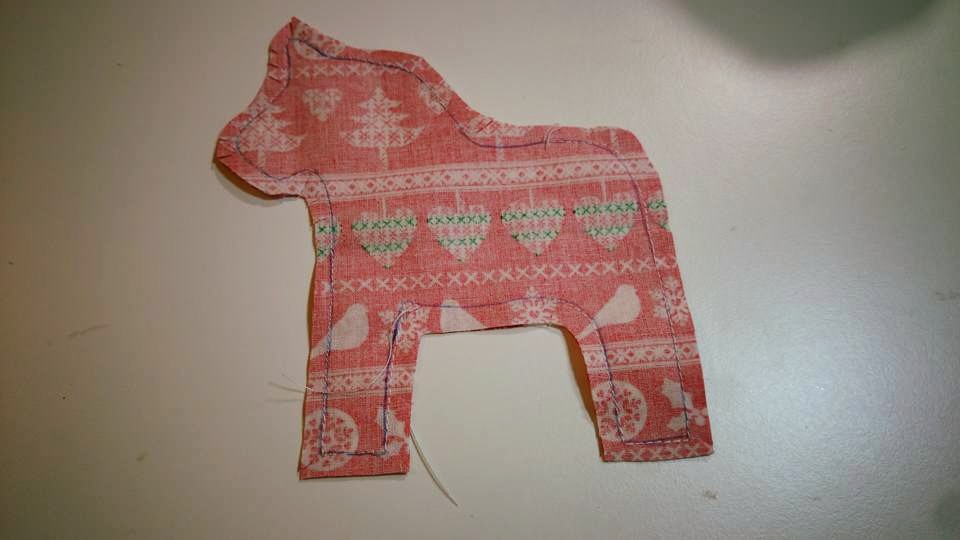
I was well underway on the trees and the Dala horses before I thought of doing the tutorial so my pictures aren’t in order, but you will get the idea.
Supplies needed:
- Christmas fabric (1/4 yard made about 6)
- Cinnamon sticks (1 for each ornament)
- Coordinating yarn color (for the loop to hang on the tree)
- Polyfil
- Sewing machine and basic sewing supplies
Take the fabric and fold in half with right sides together (RST). Place on top of your cutting mat.
 Free hand draw a Christmas tree body (think a triangle) on a piece of scrap paper and trim the tree out on the line. Place the pattern on top of the fabric (the pattern will be on the wrong side of your folded fabric). Trace the pattern as many times as you can; you will need at least a 1/2″ of space between each tree to account for your seam allowance.
Now you will cut your Christmas trees out – but remember, you need a 1/4″ final seam allowance so cut approximately 1/4″ from the outside of the line all the way around.
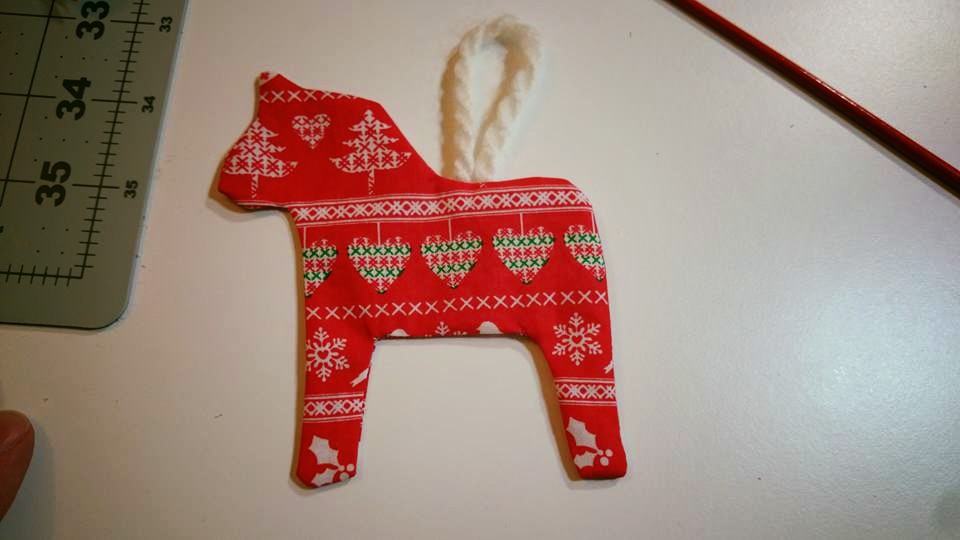
Cut a piece of yarn and make a loop. Decide what size you want the loop to be for your ornament. I think I cut my yarn approximately 5″. Fold the yarn in half and place the loop part in between the two pieces of fabric so that it is inside the tree (not outside the tree). The two end pieces should be sticking out the top of your tree and will be secured in your straight stitch.
 Starting on the bottom of your tree (about 1″ from the edge) put your needle down into the fabric and create a back stitch. Sew from that spot to the edge (along that 1″), then sew on the drawn line straight up to the top of your tree, along the top and down the other side. Sew in an inch on the bottom on the other side as well and create a back stitch. What you have now is an opening at the bottom of your tree to turn your tree inside out.
Turn your tree inside out. Gently pull your yarn so that the loop is nice looking. Gently poke each corner with your Purple Thang (or, ahem, the end of a tiny, thin paint brush). Stuff your ornament with polyfil until it is the thickness you desire. Now insert your cinnamon stick into the middle of the tree and either whip stitch or blind stick the bottom closed, going around the cinnamon stick so that it is secured. I used a blind stitch because that is how I attach the back of the binding to my quilts.
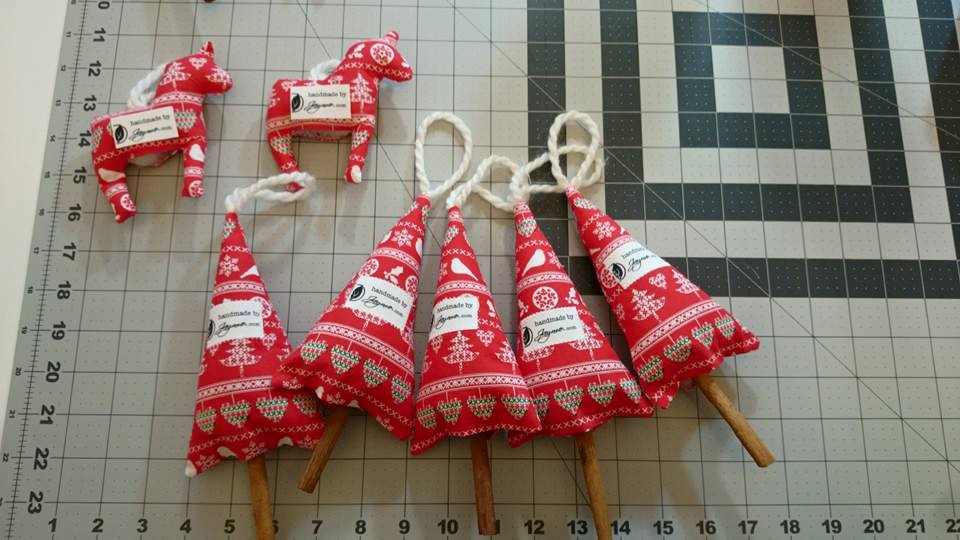 Now you have a gorgeous ornament to give to friends or family, or heck, to hang on your own tree.
Have fun!